PROJECT UPDATE!!: 04/05/2015 Corner Cabinet
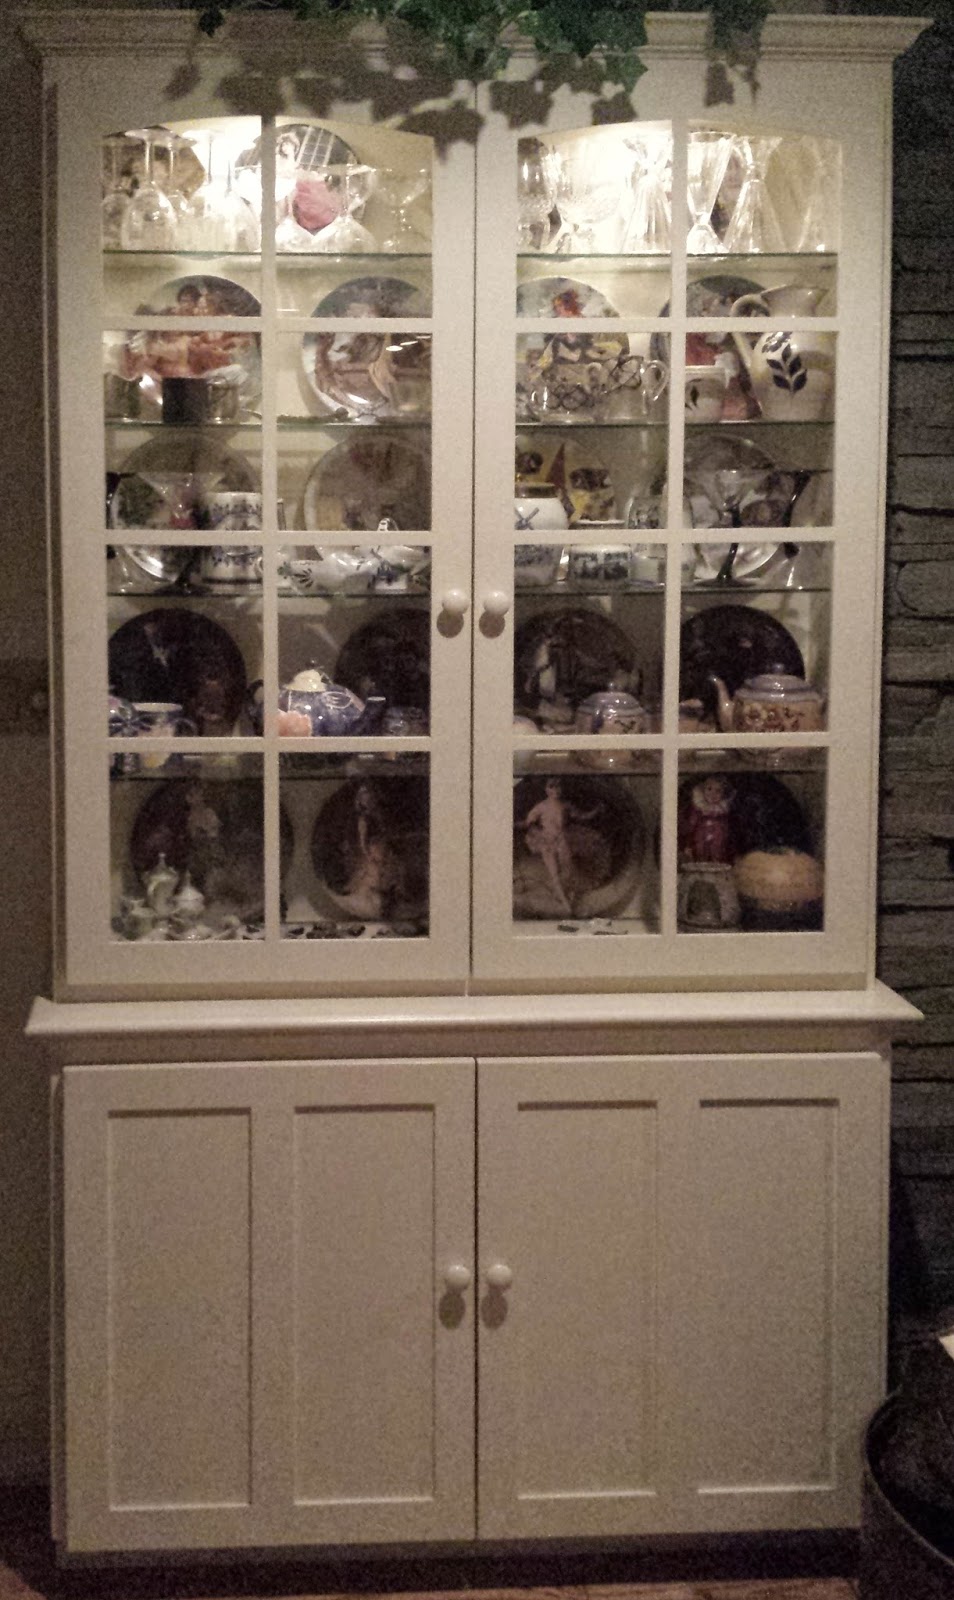
This is another lead from Thumbtack. A really nice local couple wanted to replicate the style of their existing cabinet (see below) in the opposite corner of the room, with a space for their big screen television. The challenge here is that the angles are tricky, to say the least.


 Update: 1/29/2015
I've moved on to the cabinet doors and trim on the bottom section. Each of these steps has presented unique challenges because of the oddly shape of the piece. For instance, after I built up and sized the doors I did a preliminary mounting with the hardware. Because the angle between the interior wall and the exterior wall on the right side of the cabinet is an acute angle, the hinge, designed for a 90 degree angle, does not allow the door to close completely. I'm going to have to build angled shoes and attach the door to the shoes to square off that angle. I expect that will introduce alignment challenges, but time will tell.
 Above you can see the rails and stiles being sized and aligned with the left side door.


 Here's the left side trim. Not much challenge here, just make up the corners, but below is the real challenge. I had to figure out how to finish off the right side where the top curves into the wall. I thought about breaking multiple angles to bring it around, but that would be a lot of work for a mediocre solution.
 The Solution . . .


AND FINALLY . . .


 SO here's the fill piece being fit up. After I get it all shaped and dimensioned it should slid right up to the wall. Hopefully delivering sometime this week.

Here's the existing cabinet that's being used as the model:
The new cabinet will be somewhat wider. Also, the bottom three sections of glass door will be open space for the television. Below is a drawing that represents the concept. Final drawings are in progress.
The original base dimensions give an idea of the challenges involved in making all of the corners work.
The 120 degree angle at the back right corner reflects the angle of the wall. The right side is constricted by a window, so the whole thing has to fit between the back wall and the window trim. You may also note that the front right corner is an acute angle and the front left is an obtuse angle. Below is the first cut at the base . . .
I brought it over and set it in place and quickly realized that I had some adjustment to do. One, I had to account for a heat register that will run beneath the right side of the cabinet. Two, when it all came together it was past the window trim. I had to tear apart most of it and rebuild, but that was expected.
Now, I can start to build it up. Below the sides are roughed in.
The heat register opening added a layer of complexity.
UPDATE 1/7/15
I've gotten a lot done since the last update. The piece was brought on site to confirm I had the dimensions right. I was pretty close, so I brought it back, and finalized all of the knocked up parts. Glue, nails, screws and pegs to secure all of the components. Then today I did a preliminary fitting of the top. I routered the edges to get them nice and clean. I'll be adding an inch and a half of bullnose to two sides on the finished piece.
So here's where it's at now. I'll be scheduling another visit to get final proof of fit and then I'll build up the rest. I'm on a tight schedule, as I am trying to finish this sometime early in February. Got to keep this one moving forward every day,
I've moved on to the cabinet doors and trim on the bottom section. Each of these steps has presented unique challenges because of the oddly shape of the piece. For instance, after I built up and sized the doors I did a preliminary mounting with the hardware. Because the angle between the interior wall and the exterior wall on the right side of the cabinet is an acute angle, the hinge, designed for a 90 degree angle, does not allow the door to close completely. I'm going to have to build angled shoes and attach the door to the shoes to square off that angle. I expect that will introduce alignment challenges, but time will tell.
Here's a look at the mounted doors

I turned the spindle about out of some poplar scraps. I tried to get as close to the curve of the cove molding as I could. Then I quartered the spindle longitudinally. I took the best quarter and glued it to the end of the cove. The I shaped it and puttied it to smooth the turn.
I realize it looks pretty rough right now, but after some finish sanding and priming & painting it will flow organically and look awesome.
Update Feb 11, 2015
OK, moving it along at a pretty good clip. The top is coming together as the next few pictures will show. Right now it's just roughed in, but over the next couple of weeks I'll be doing the final shaping and getting it ready for finishing. Above you can see the right shoe I fabricated to accept the top section. The shoe joins to the bottom with 3 3/8" wooden pegs.
Here's the upper cabinet being formed above the component rack. The top will be finished with a crown molding to match the original.
No, I'm not showing off my water treatment plant. Here's the initial knock up
OK, so this is the first time all of the components are together, well almost all of the components. I still need to put the back on and get the glass for the upper doors. I am quite pleased with the progress so far, but there's still a long way to go.
UPDATE MARCH 16, 2015
We took the piece over for a test fit and realized I had a few more alterations to do, but ultimately, it dropped in and fit nicely.
The next two pictures show the weird angles I had to build this thing to fit
I got the upper cabinet doors put together and the glass installed.
AND FINALLY . . .
We can start finishing this baby. The next few pictures show the primer coats
and finally the top coats . . .
UPDATED 04/05/15
Well, it's almost finished. I delivered the bottom half and took the final measurements for the top half last week. I have to add a filler piece to the right side and fit the trim so it meets the wall correctly. Then a few touchups and install it and done! This has been a long project and a very rewarding one. I met a really nice couple and got to challenge my skills at nearly every turn. The reception for the last fitting was very positive and I believe when I finish installing the last piece I will have another very happy customer!


Comments