Posts

Showing posts from 2015

Project Update -- 11/30/2015 Sewing Machine

Image
This beautiful old sewing machine is in need of some serious TLC.  There are lots of beautiful carvings and features, but there's equally as much damage.  It's going to be a challenge to salvage as much as possible to preserve the character of the piece without being too heavy-handed. The top is pretty much ruined with water damage.  There's no saving the veneer.  Clenaing up the intricate details is going to be tedious, but the payoff is going to be worth it. Here's a look inside.  The action is surprisingly sophisticated.  Nice nickel plated hinges, too  Here's the machine exposed.  The cowl on the back will need to be rebuilt.  The wood is pretty much gone. So now it's in pieces waiting to be stripped, fixed, finished and reassembled.  This is going to a breathtaking piece when I finish it. UPDATE 11/30/15 Stripping went OK,  What was left of the old finish came off pretty easily, but the water damage caused the gra

Project Log -- 10 18 2015 Antique Mirror

Image
A good friend asked me to see what I could do with this timeworn old mirror.  It's an attractive piece, but it's really in rough shape.  The original plywood backer is delaminating.  The veneer on the front is all but ruined.  So, it's going to be a lot of work to restore this and maintain its original materials. You can get a feel for how bad the plywood has decomposed in the picture below. The fancy trim pieces also function as mirror holders. The worst of the veneer damage is on the base of the frame.  Patch and match isnt going to work because the veneer is too water damaged.  I need to remove it, but very carefully so I can use it to make a pattern for the new veneer.  The process of steaming the veneer off (at my wife's suggestion) is pretty straightforward.  I put a soft cloth soaked in water on top of the veneer and then I put a hot iron on it.  I let it steam until the rag was dry and then I used a putty knife to tease it up.  Some of it came up i

Project Log -- Updated 8/13/15 -- Pine Dining Room Set

Image
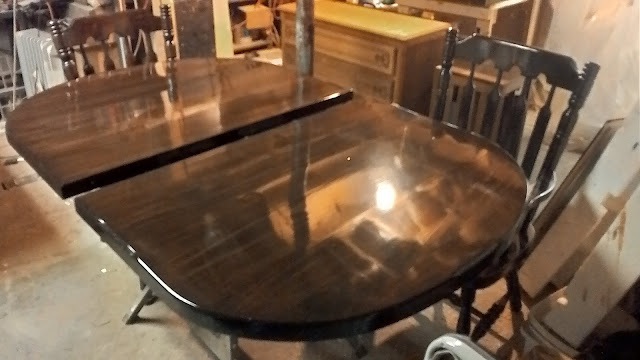
This project came in when I was super busy, and so it took a lot longer than it should have.  Fortunately, this was a very patient customer and I made sure to give him my best work.  The job was a 6 chair and table pine dining room set + two leaves, complete refinishing to the original high gloss finish.  I started with four of the chairs and then when those were done I picked up the other two chairs, table and leaves.  The chairs were in pretty rough shape and pine is not an easy wood to work with because it is so soft and absorbent.  I finally got them stripped and stained though. I was fighting high humidity, so the chairs had to dry for a week before I could apply the top coats.  But they came out really well.  PATIENCE is the key to so much in this business. Finally, it was time to strip and sand the leaves and table  Again waiting for stain to dry.  For this project I used General Finishes Java Gel Stain.  Then I built up the top coat an